Dockerfile.
Before continuing, make sure you have:
- A Bun application ready for deployment
- An AWS account
- AWS CLI installed and configured
- Docker installed and added to your
PATH
Create a new Dockerfile
Create a new Create a new
Dockerfile in the root of your project. This file contains the instructions to initialize the container, copy your local project files into it, install dependencies, and start the application.Dockerfile
Make sure that the start command corresponds to your application’s entry point. This can also be
CMD ["bun", "run", "start"] if you have a start script in your package.json.If your app doesn’t have dependencies, you can omit the RUN bun install --production --frozen-lockfile line..dockerignore file in the root of your project. It lists the files and directories to exclude from the container image, such as node_modules, which keeps builds faster and smaller:.dockerignore
Build the Docker image
Make sure you’re in the directory containing your
Dockerfile, then build the Docker image. This example names the image bun-lambda-demo and tags it as latest.terminal
Create an ECR repository
Before pushing the image, create an ECR repository to push it to.The following command:
- Creates an ECR repository named
bun-lambda-demoin theus-east-1region - Exports the repository URI as an environment variable. This is optional, but makes the next steps easier.
terminal
If you’re using IAM Identity Center (SSO) or have configured AWS CLI with profiles, add the
--profile flag to your AWS CLI commands.For example, if your profile is named my-sso-app, use --profile my-sso-app. Run aws configure list-profiles to see your available profiles.terminal
Authenticate with the ECR repository
Log in to the ECR repository:
terminal
If using a profile, use the
--profile flag:terminal
Tag and push the docker image to the ECR repository
Make sure you’re in the directory containing your Then, push the image to the ECR repository.
Dockerfile, then tag the Docker image with the ECR repository URI.terminal
terminal
Create an AWS Lambda function
Go to AWS Console > Lambda > Create Function > Select Container image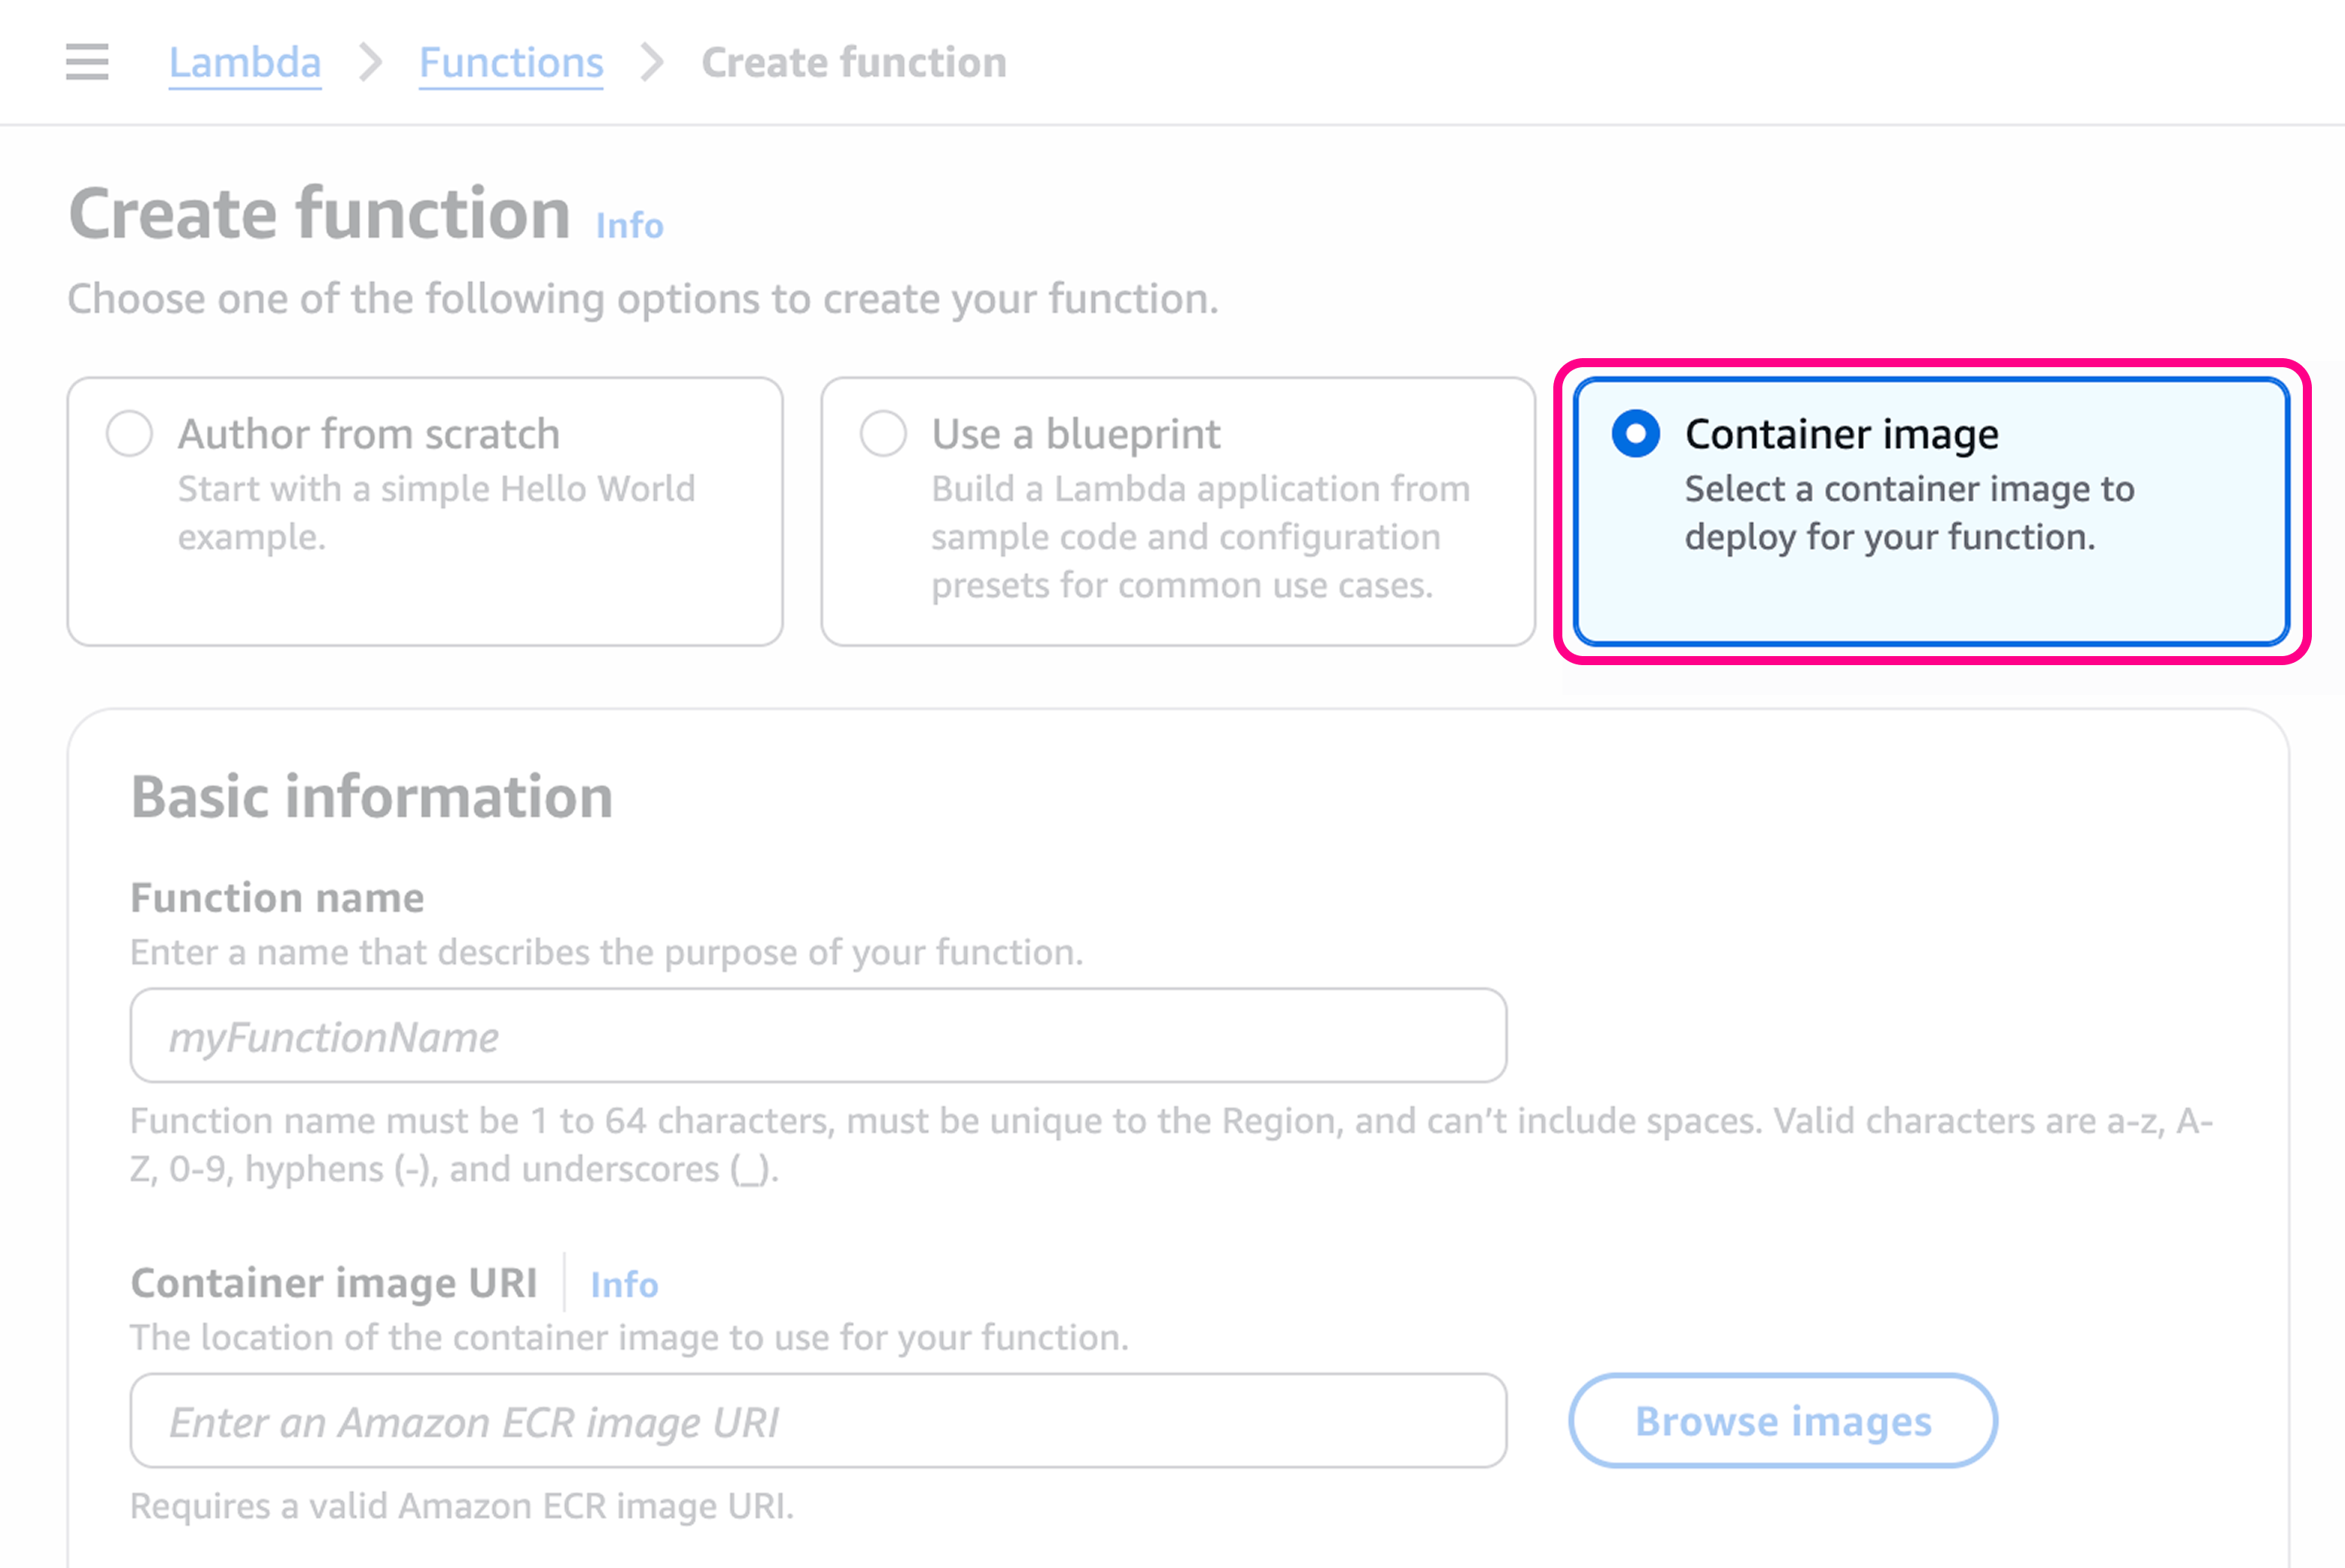
my-bun-function.Select the container image
Go to the Container image URI section and click Browse images. Select the image you pushed to the ECR repository.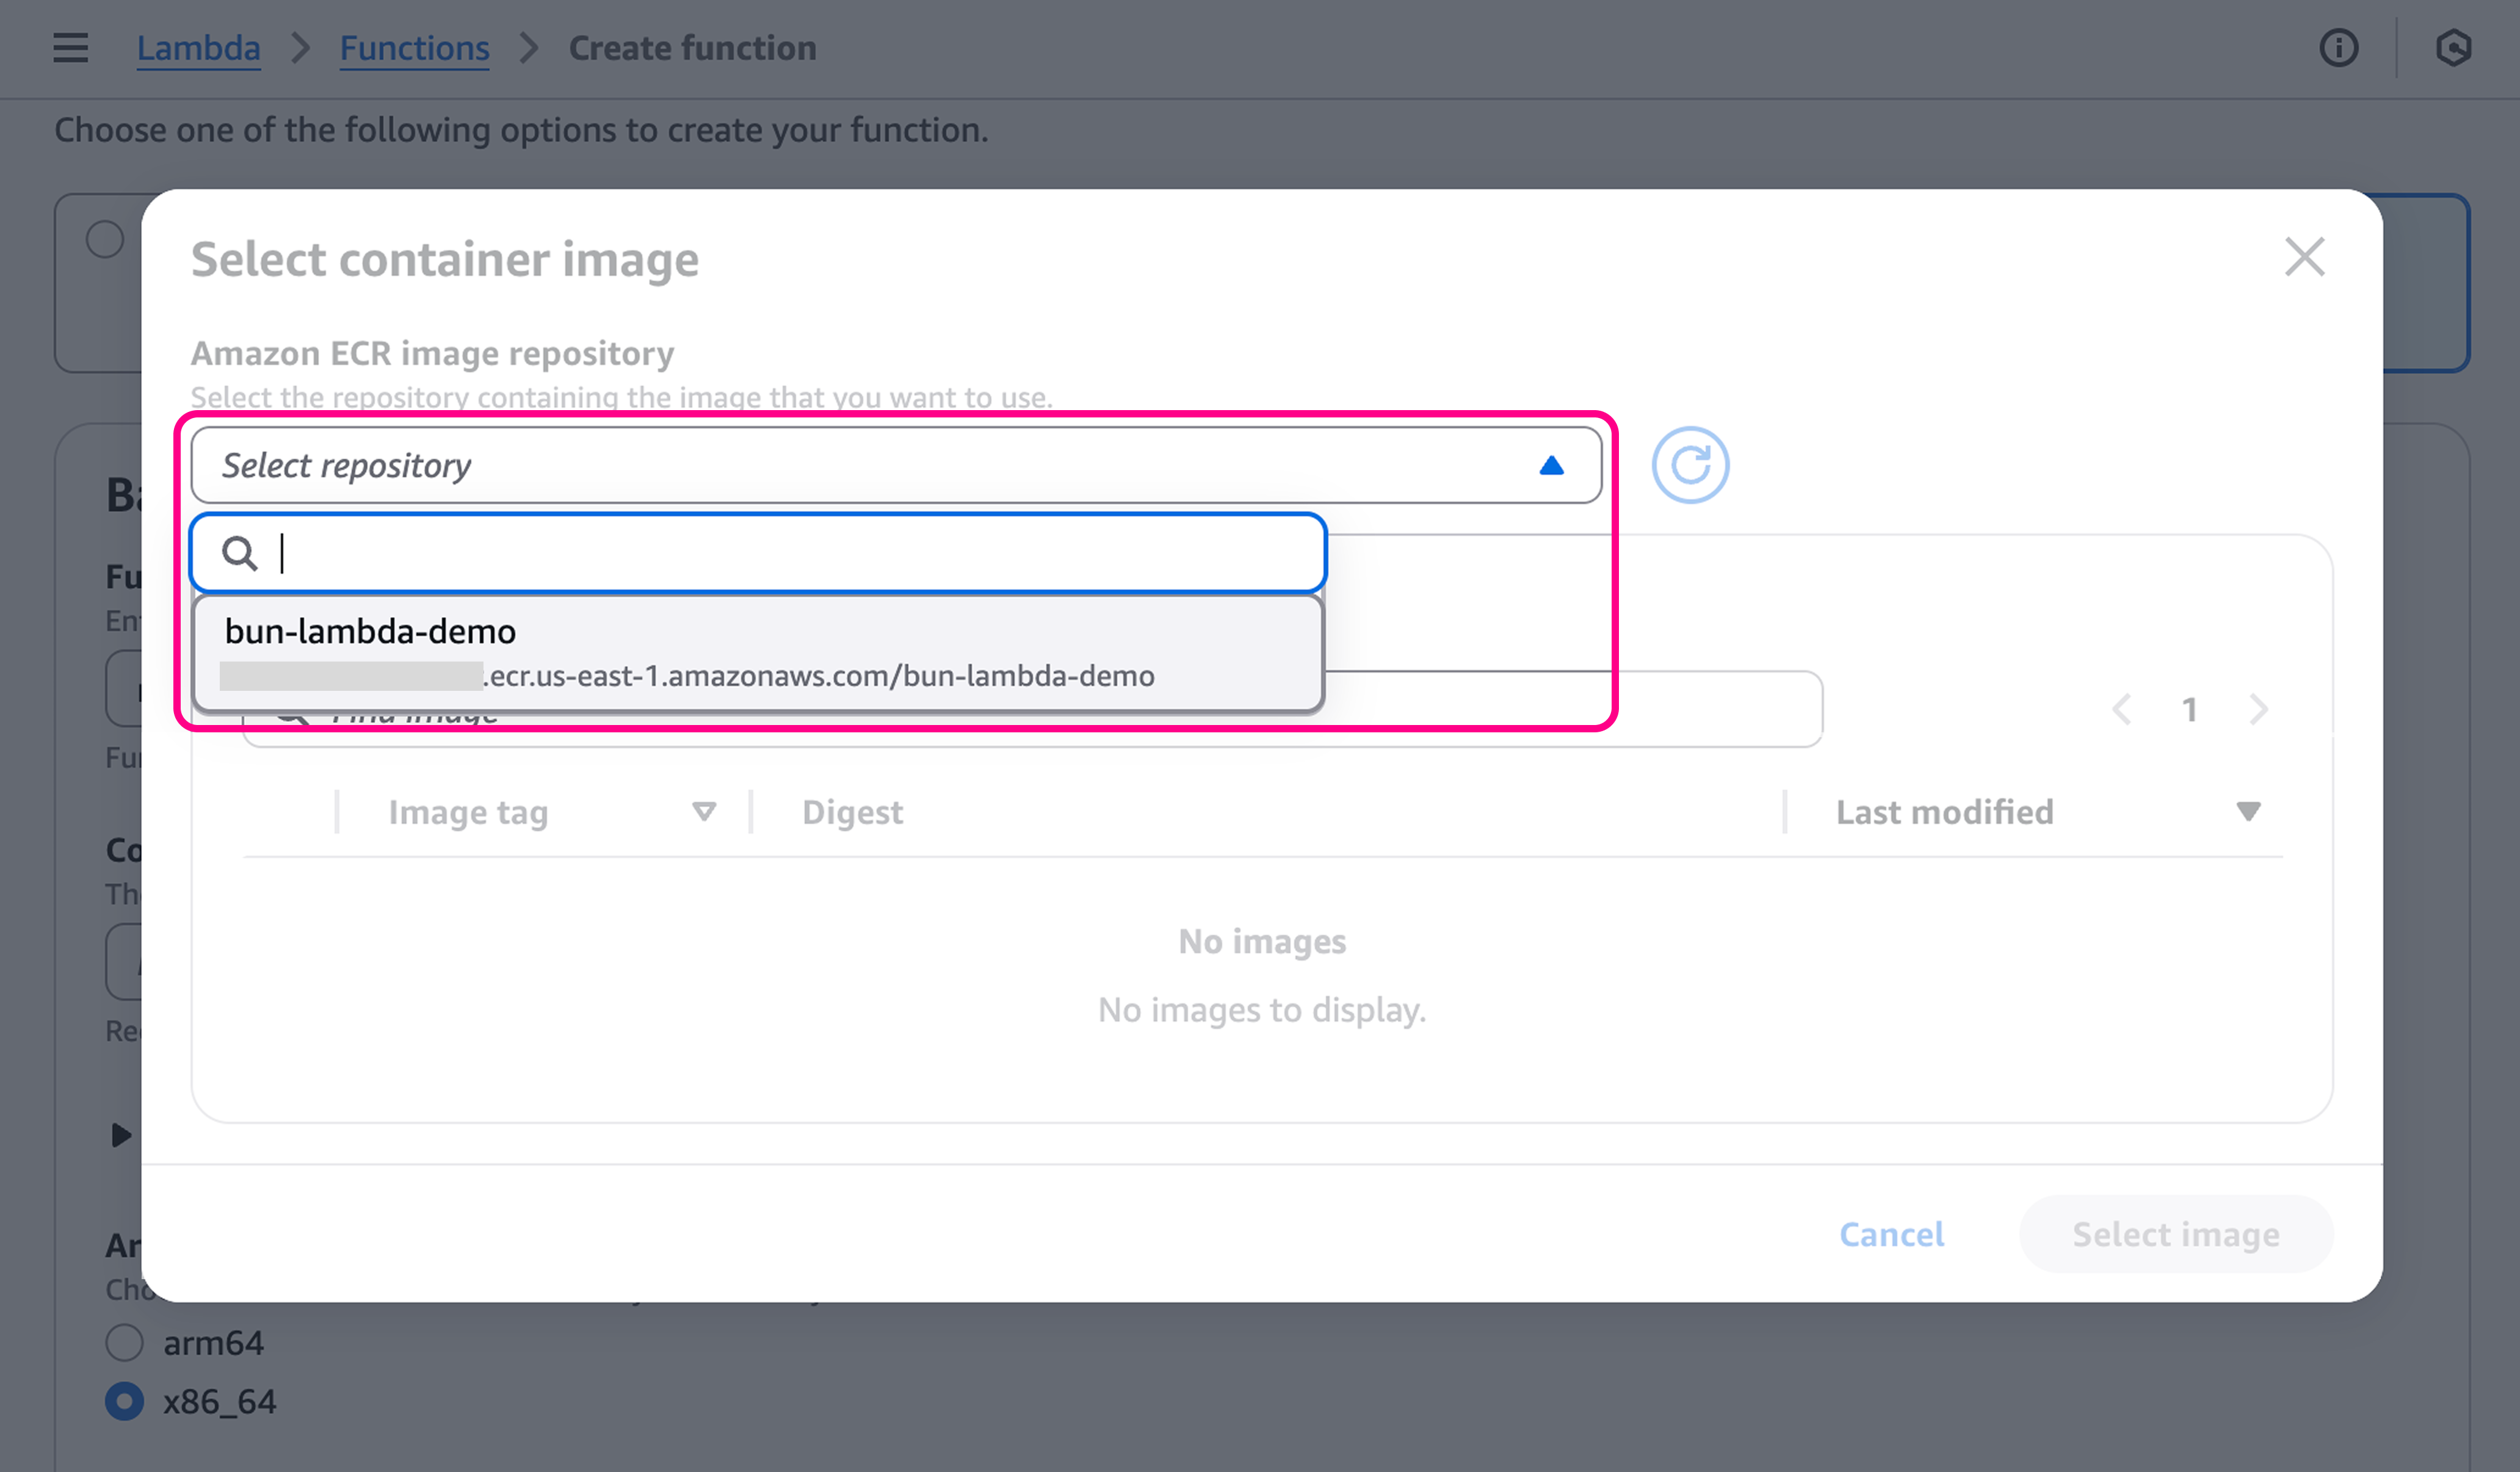
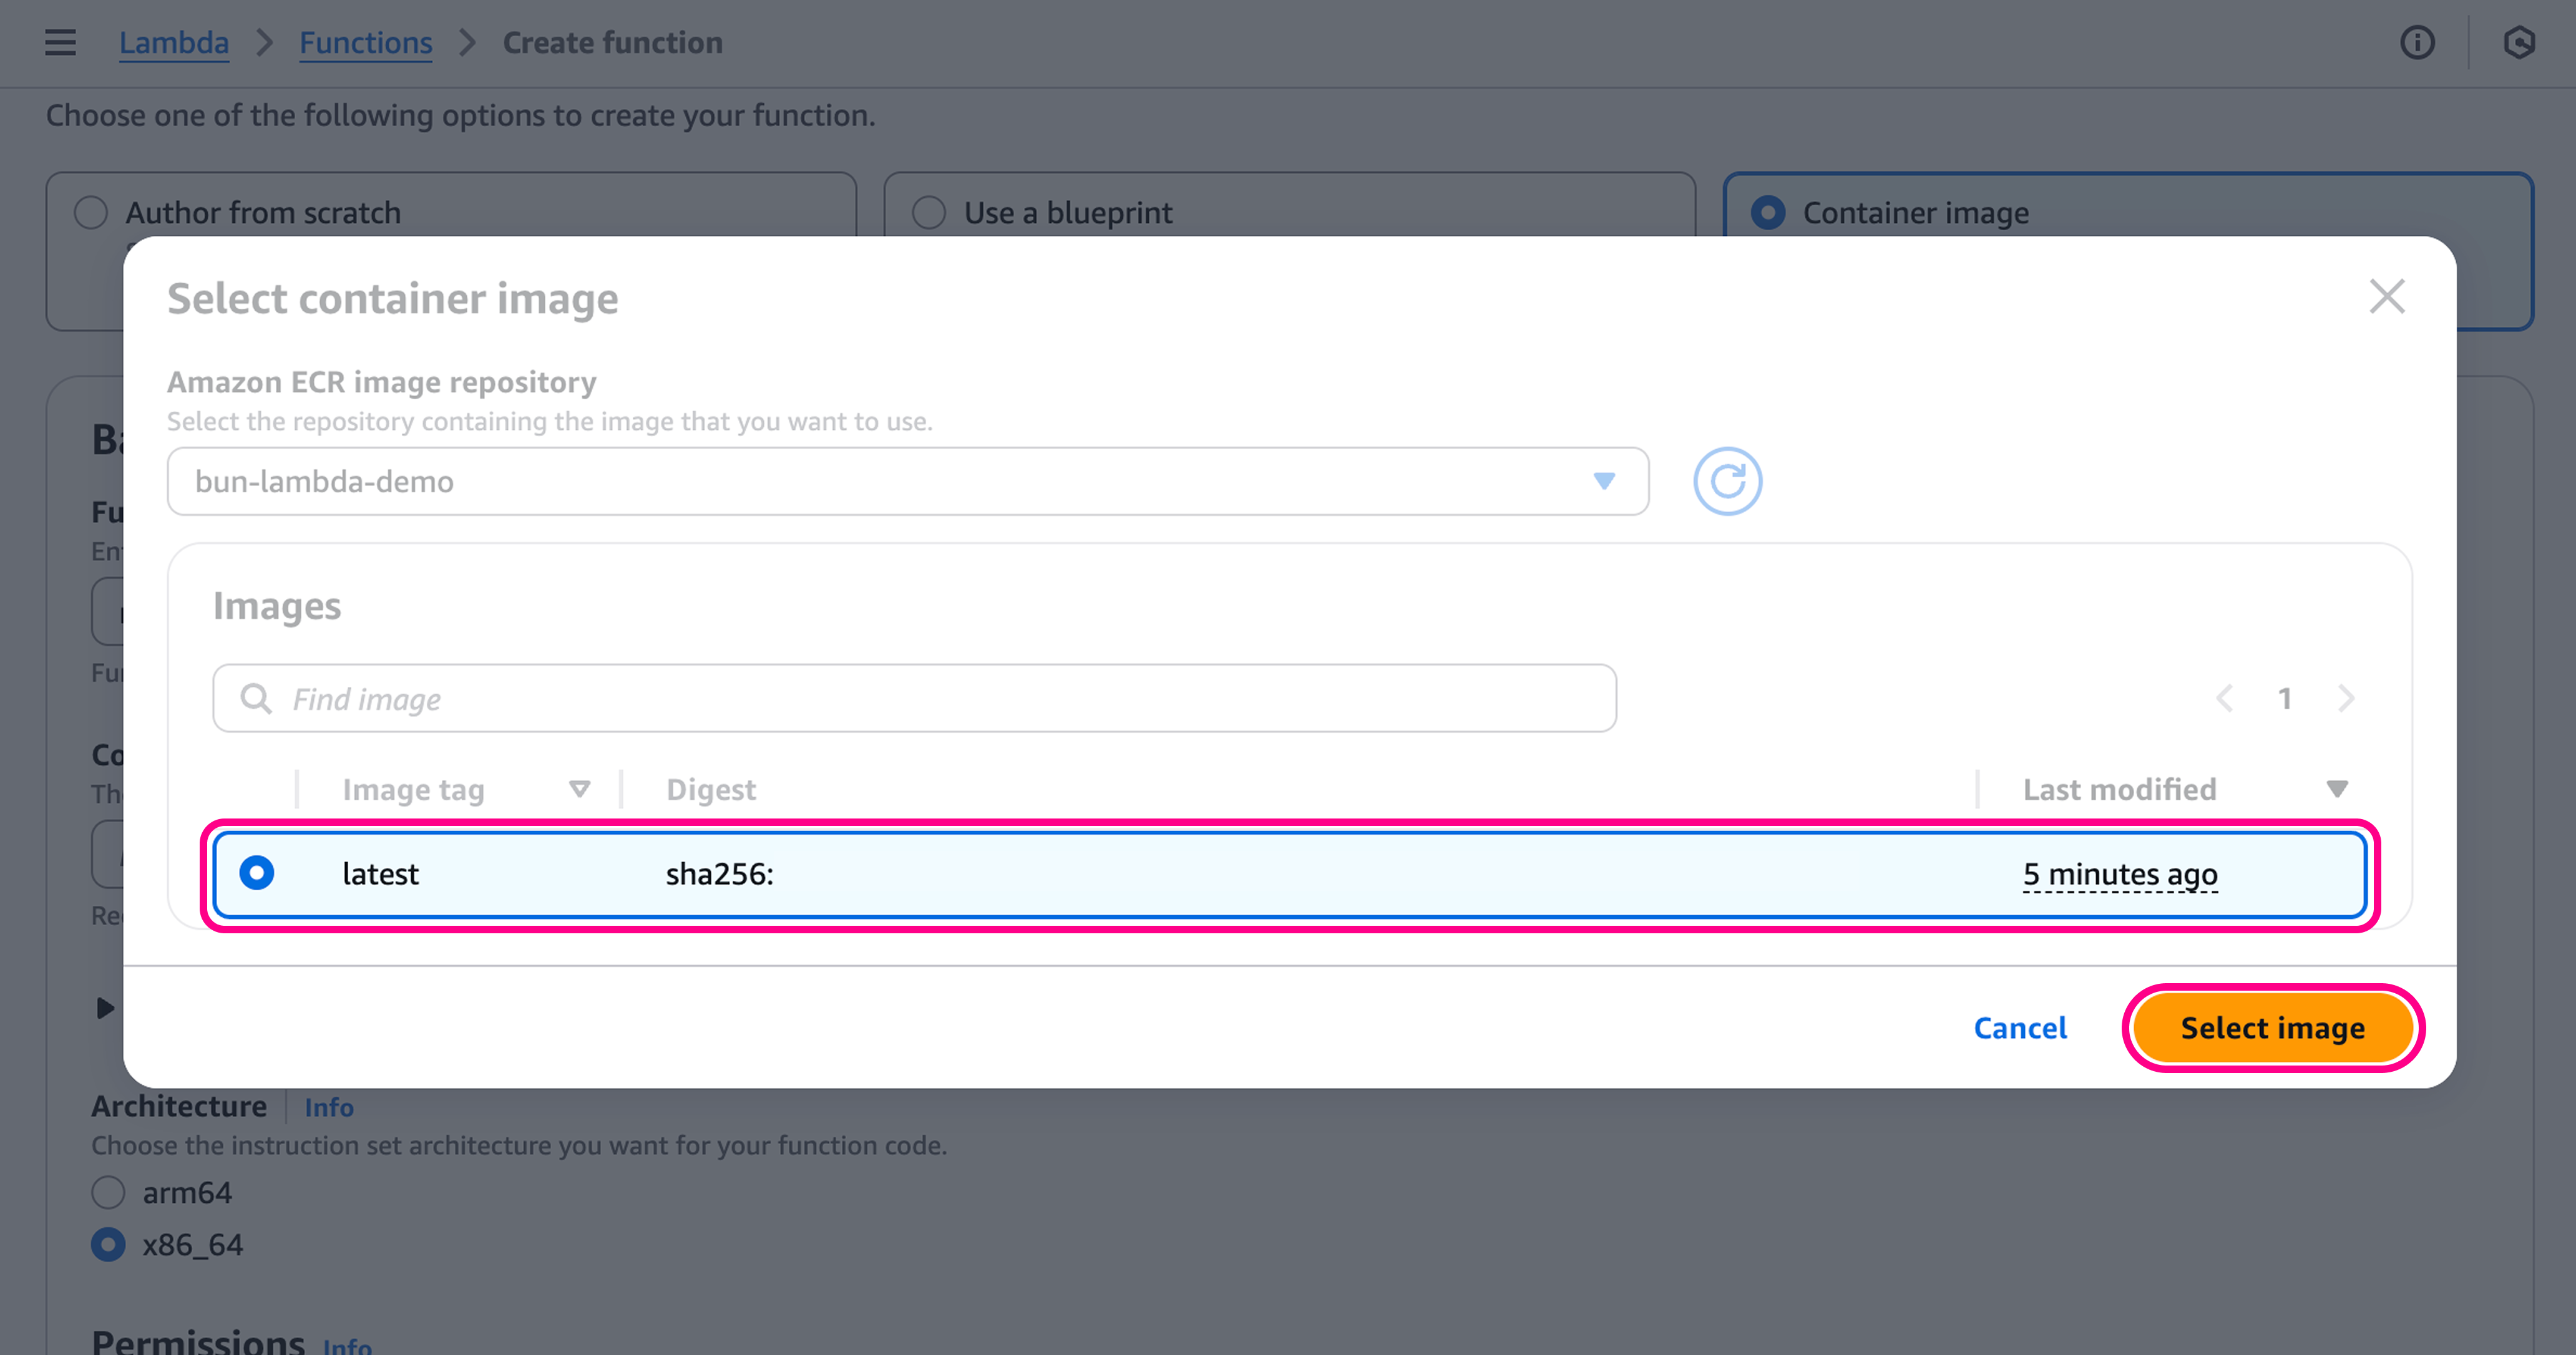
latest image and click Select image.Configure the function
To get a public URL for the function, go to Additional configurations > Networking > Function URL.Set this to Enable, with Auth Type NONE.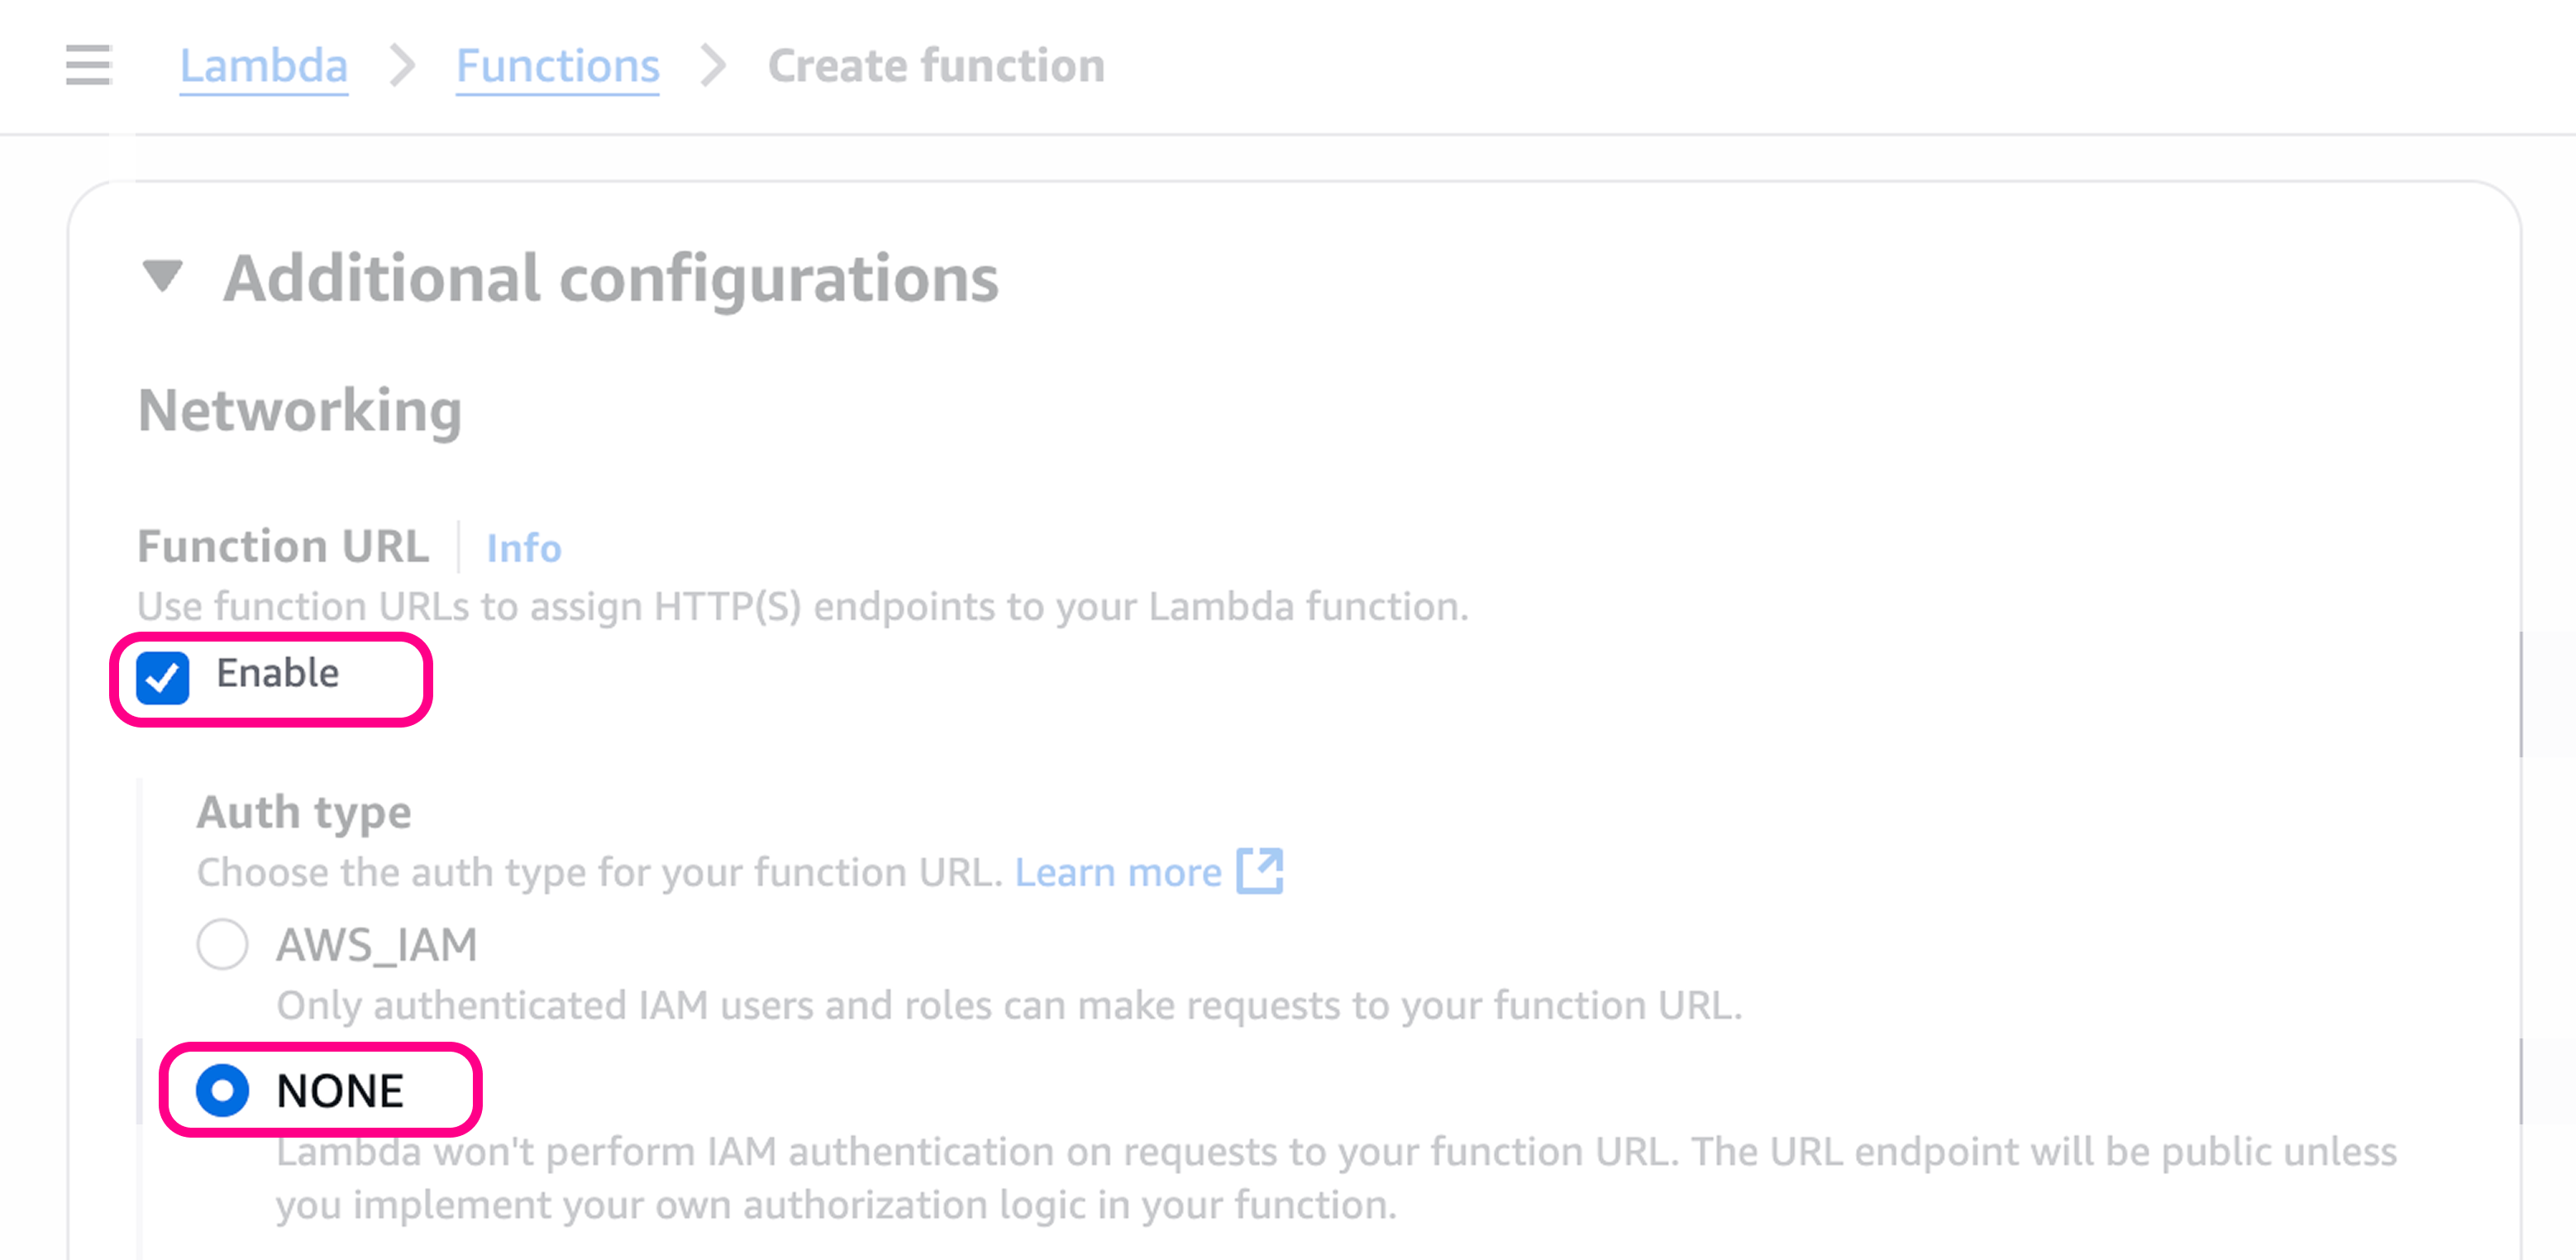
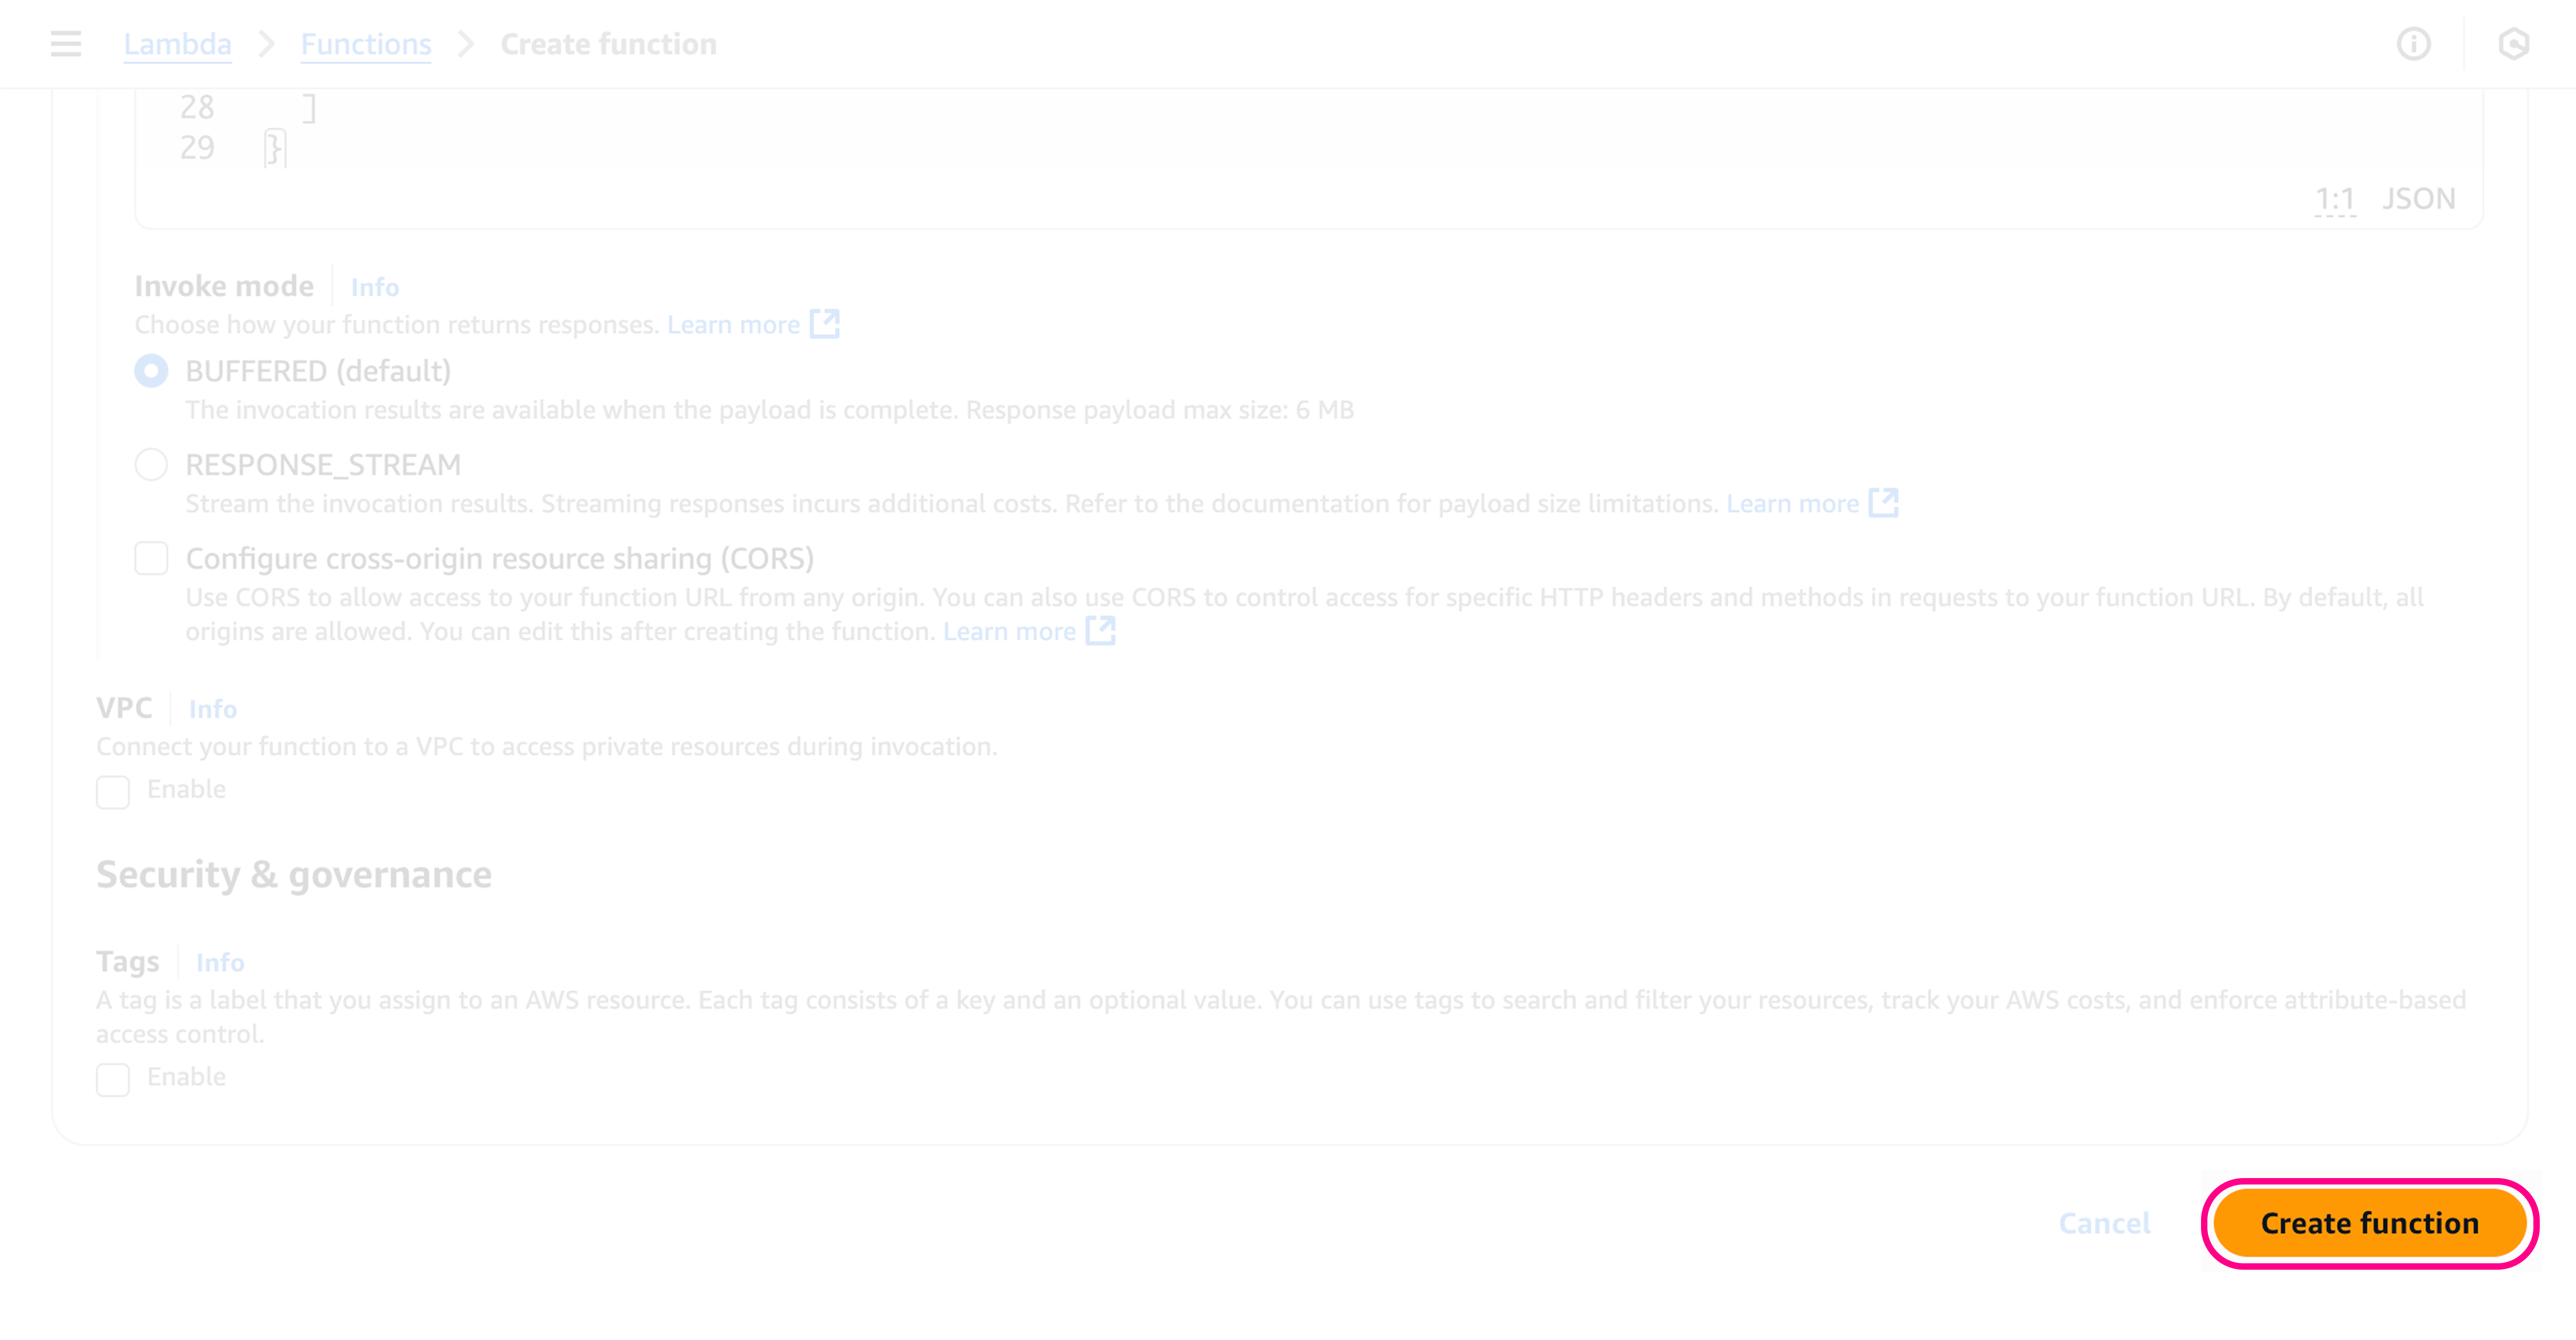
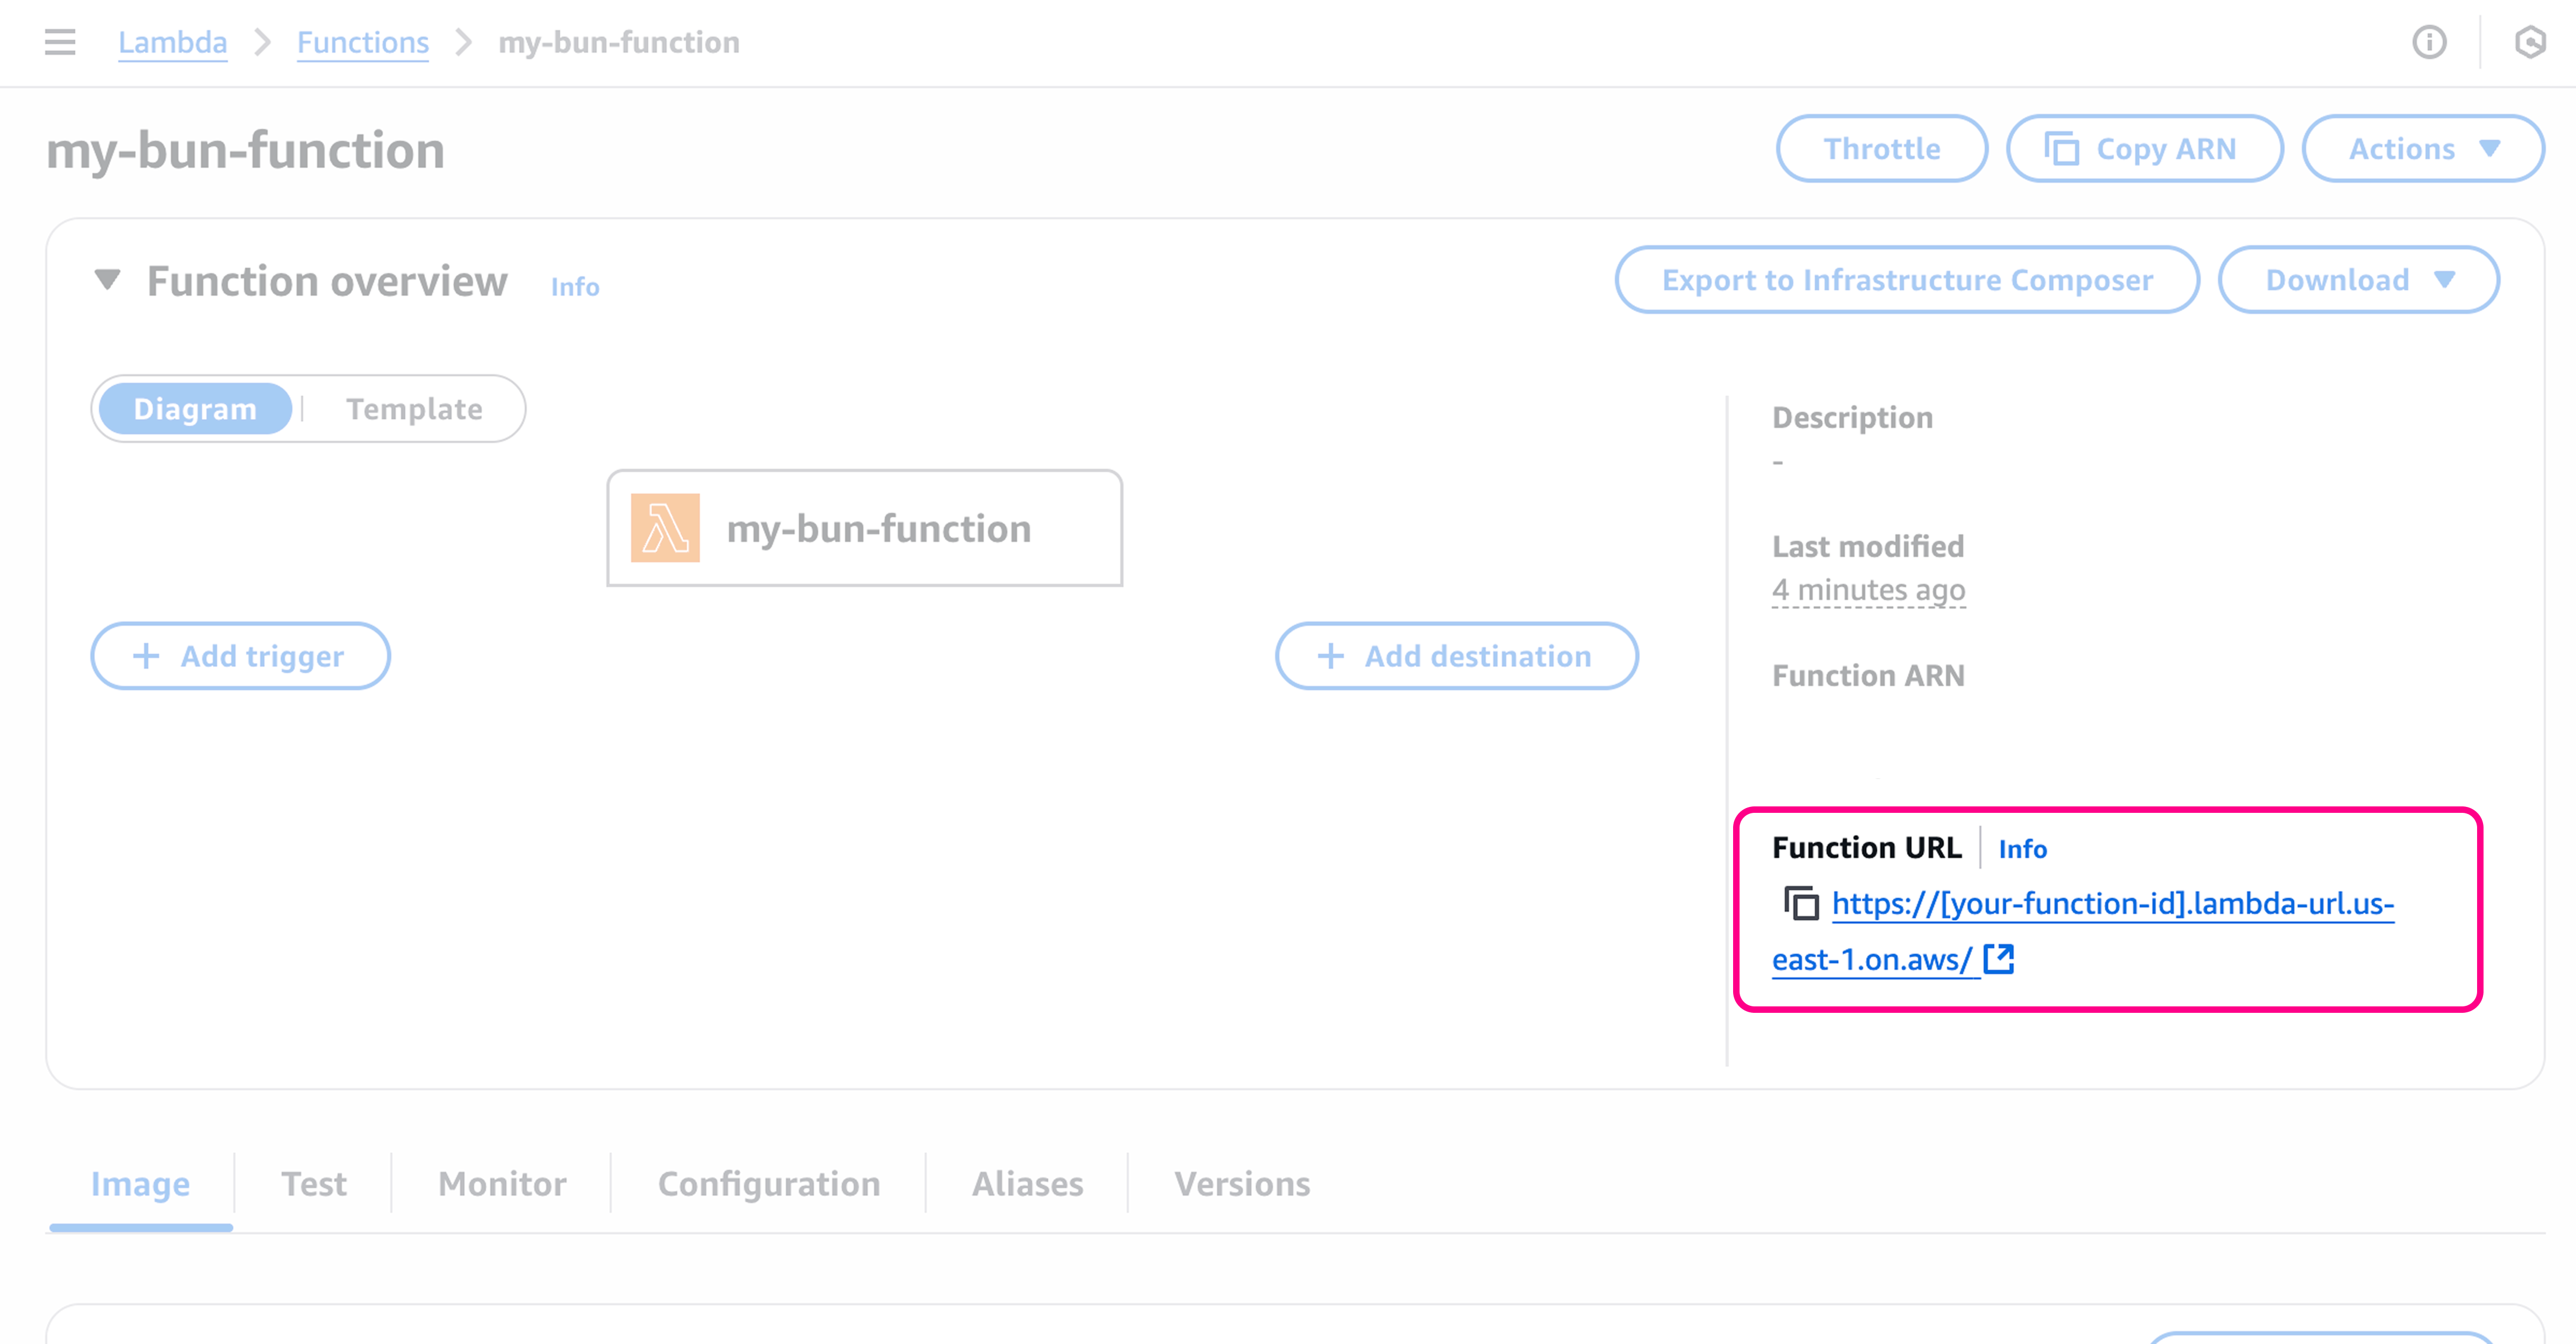
Get the function URL
Once the function is created, you’re redirected to its page. The function URL is in the “Function URL” section.